
Networking Yamaha Consoles with your Apple Products
The hardest part in the networking process is the crossover in customer service that applies when one manufacturer claims that they have done their part and it’s up to the other guy to help you on the next step. It gets even harder when you enter in another manufacturer or in this case maybe a fourth. I started this document for my own sanity as a step-by-step process in a field that I know little about.

I admittedly don’t know a lot about networking, but I learned what I needed to complete the task of first networking my console to my MacBook and then with the development of the LS9 StageMix app, connecting to my iPad. This page will help you with networking if you are an Apple Product user. You might be able to translate this to a PC if you know a little more the Windows Operating Platform.
To begin the process we will need to be sure that all Firmware and Software updated to current versions. There are links to the respective sites to get them. As for the iPad, if you are still on iOS4 it is recommended that you hang out there and follow the StageMix facebook page for instructions. I updated my iPad to iOS5 and haven’t had any connectivity problems other than rare drop out from time to time. However, when I purchased a new Airport Extreme there were major connection issues. Since then i have decided to just get a few spare Netgear N150 Wireless Routers to use as spares since they seem to be very reliable.
Here are the current versions of the things you will need as of Mid November 2011.
Studio Manager: 2.3.4 (Nov 4, 2011)
http://www.yamahaproaudio.com/downloads/firm_soft/smv2/smv2mx.html
LS9 Editor: 1.4 (Oct 7, 2011)
http://www.yamahaproaudio.com/downloads/firm_soft/ls9/ls9_edt.html
LS9 Firmware: 1.3 (Oct 7, 2011)
http://www.yamahaproaudio.com/downloads/firm_soft/ls9/ls9_frm.html
M7CL Editor
M7Cl Firmware
Yamaha Midi Driver: V1.21 (Sept 21, 2011)
http://www.yamahaproaudio.com/downloads/firm_soft/network_driver/network_midi.html
Yamaha Stage Mix app for M7 and LS9 (As applicable) available through iTunes.


____________________________________________________________________________________________________
This first section deals with networking your Apple Computer to the Console itself. Some of these steps do not apply directly to the iPad so you can skip what’s not applicable. I would recommend reviewing them all.
There are several network setting that you will need to change if you want to control your Yamaha mixer via the Ethernet Port on your MacBook. I created this image “off line” so disregard the “Cable Unplugged Status”
While Yamaha doesn’t directly support DHCP Connections, apprently they will work. Yamaha recommends that you set up a Static IP address by choosing Manual Set-up within your IPv4 network settings. You should then enter in the following addresses, You won't be entering anything into the DNS Server line since you aren't using this ethernet connection to access the internet. Yamaha also recommended that you not put your console on a network that is directly connected to the internet.
IP Address: 192.168.1.100
Subnet: 255.255.255.0
Router: 192.168.0.1
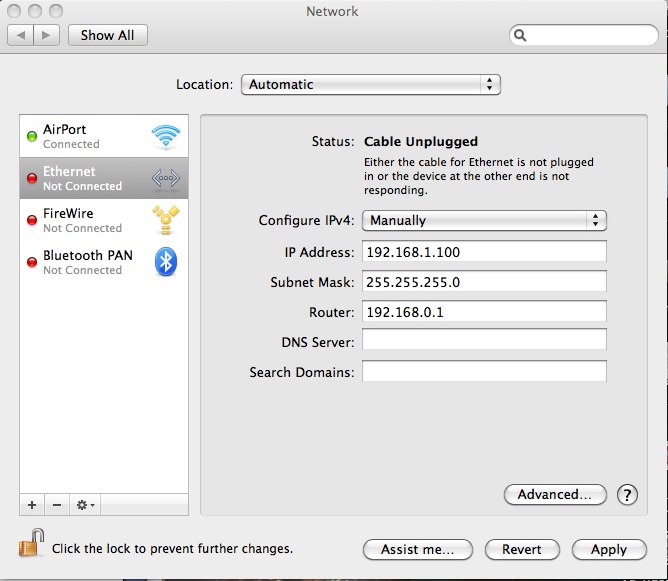
After entering these three settings you will want to hit “APPLY”
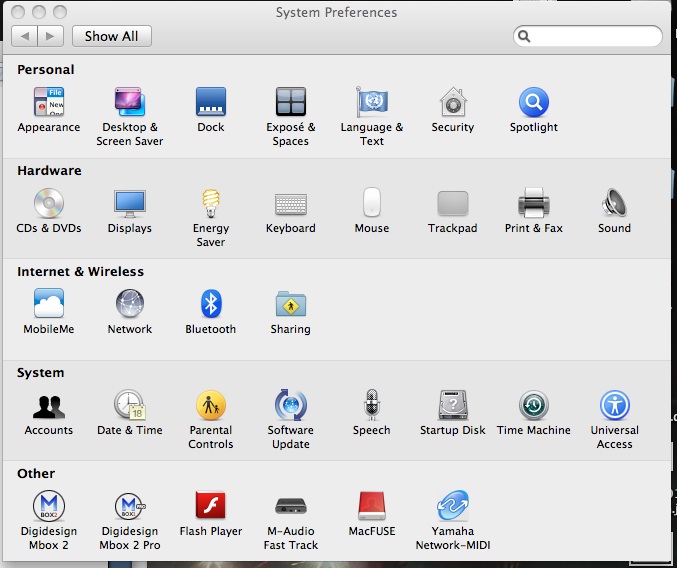
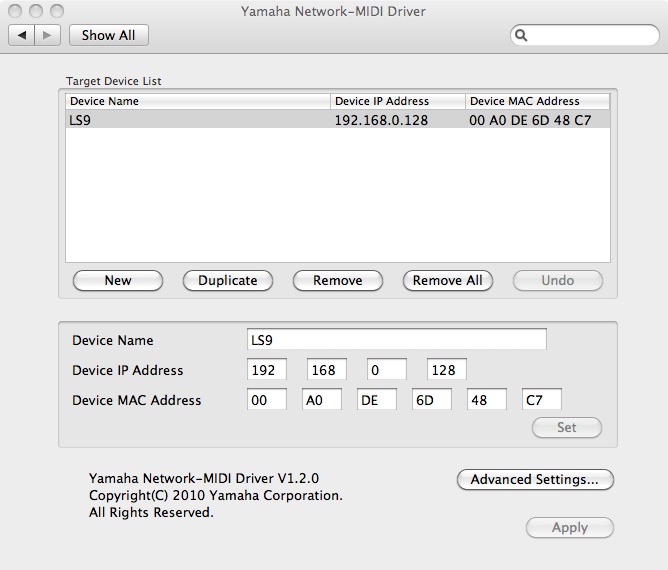
Next you will want to change the settings on the Network Midi Driver. After you have installed it you can find it on the System Preferences page.
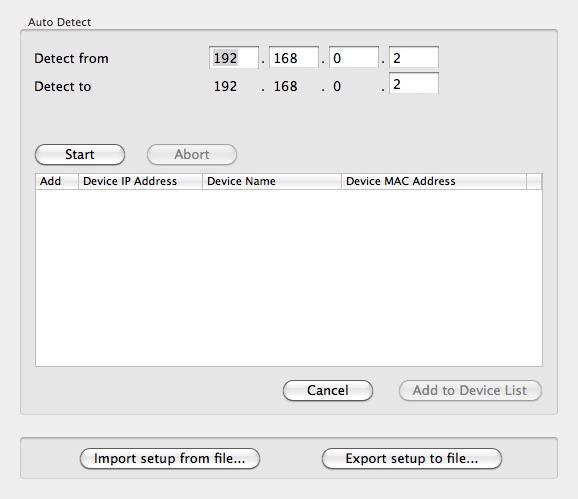
If you have attempted this process before it’s best to just select the console and click “remove” to start fresh.
Click Advanced and Search “New”
Search Range 192.168.0.125 -> 130
(the default IP address for all Yamaha consoles is 192.169.0.128)
Add and Name The Console (if you own multiple consoles you might need to get more specific than just LS9)
Studio manager will connect via the console by using the Midi Driver, it works the same way that a printer needs a driver. Now you can open Studio Manager and begin the connection process. Upon opening the Studio manager software you should see the editors that you have downloaded in the “workspace” of the screen. We aren't ready to open the editor, if you have opened it, just hit "command w" to close it- Studio Manager will remain open.
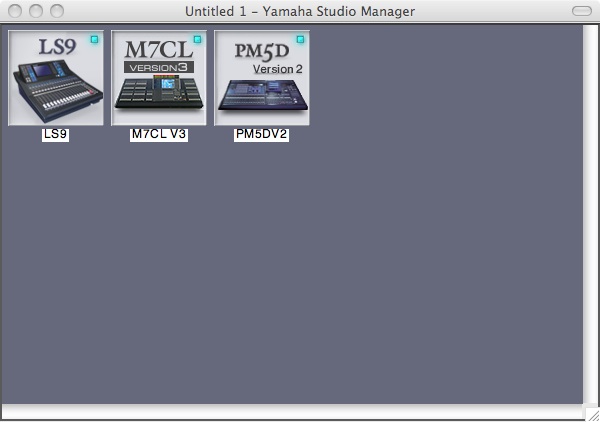
If your console(s) editor software is not shown in the workspace you will need to add it to the workspace.
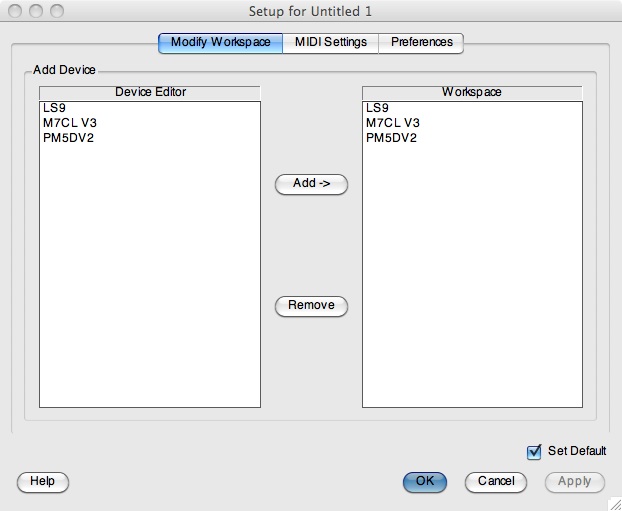
In the drop down menu in Studio Manager under SM2 follow this path:
Pref-> Midi Settings->Modify Workspace
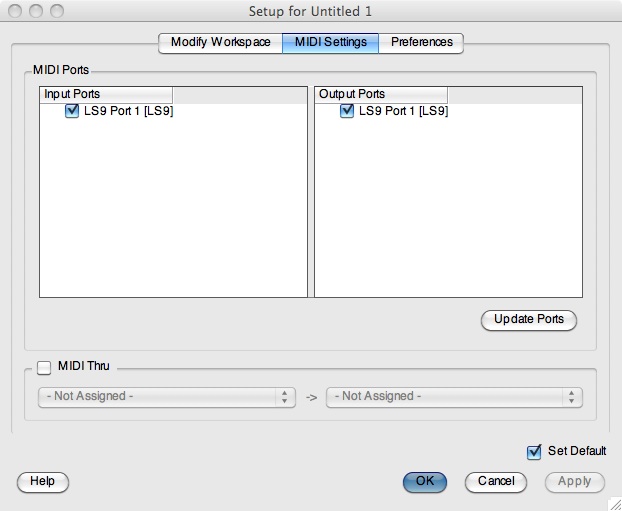
Pref-> Midi Settings-> Checks the in and Out Ports for the console and Update
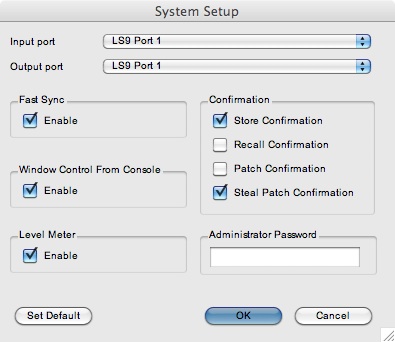
Now you can click on the editor of the console you are networking. Notice that you have a editor window within the studio manager software. You will need to open the system set-up within the editor software under the file menu.
Open Device Protocol for the your Mixer Type: Choose System Set-up and Check In/Out Ports
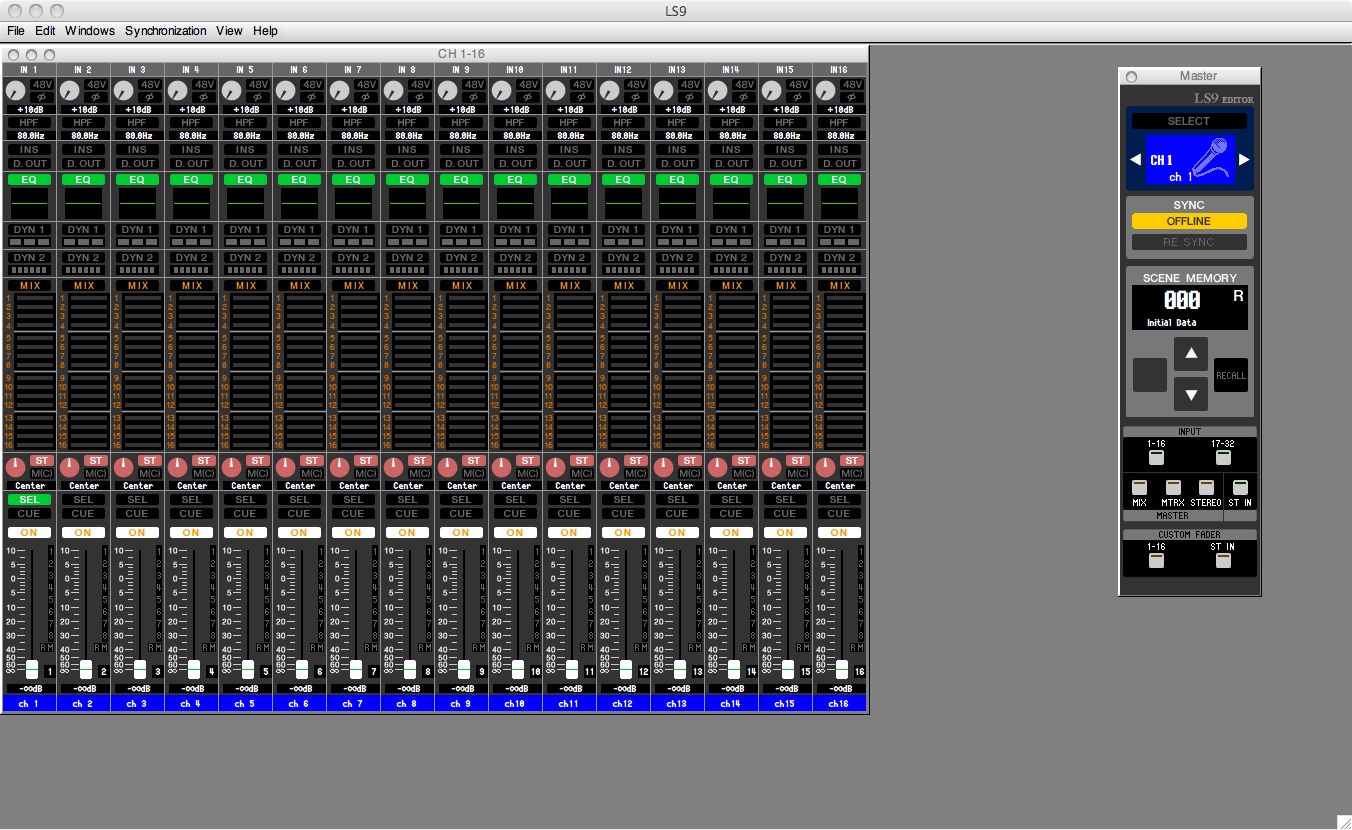
The master control box within the editor should change from being “offline”. If your editor is open and you don’t see the master control Box you can access it by clicking “Command 1"
At this point you should be able to hit re-sync and your editor window will fill with the data from your console, As soon as you move either a fader on the console or remotely from the computer you will see a change scene box that lets you know something has been changed and therefore an edit notification will present itself. You may store and recall from the computer just as you would in the scene section of your console. Almost all of the features that are available on the console are available for remote edit with the exception of a few that are console dependent such as the word clock settings Also, the output delays are not available on the LS9 editor, but are available on the M7CL editor.pen and you don’t see the master control Box you can access it by clicking “Command 1”
____________________________________________________________________________
Adding a Wireless Router to your Yamaha Network
*Router must transmit with a Static IP Address with range of Console. Yamaha does not support DHCP.
This information will give you wireless control of all the settings within studio manager and let you cut the cord between your computer and the console. Once the stagemix app became available, I haven’t actually connected to the console in this fashion. It really tends to bugger up the basic wifi settings of the laptop and it had problems re-establishing it's natural DHCP connections.
Just as above you will need to dive back into your network settings, except this time you will changing the Airport Card settings in your computer.
Apple Network Airport Settings
After Starting Wireless Router open Network Setting and Find Wifi Router for Console, select and choose Advanced
Choose TCP/IP and configure IPv4 Manually
Address: 192.168.0.126
Subnet Mask: 255.255.255.0
Router: 192.168.1.1
These setting are for the Netgear Routers, the specific one that I use is a RangeMax N150. It has one input and four outputs.
NetGear Router Set-up
Connect a Cat5 cable to the router and enter the follwing web address. Be sure that your airport is turned off. It will ask you for a login and password, there won’t be one yet.
http://www.routerlogin.net/
There are several tabbed pages of settings to change…
Basic Settings:
Internet Connection: No
Static IP Address: 192.168.0.127
Subnet Mask: 255.255.255.0
Gateway IP Address: 192.168.0.1
DNS Primary 4-2-2-2, Secondary 4-2-2-3
Wireless Settings:
Name: Name Your Network
Security: WEP
Passphrase: Create a Password
Create Keys: There will four of them
Guest Network
Disable SSID, or Not: you choose. (Disabling the SSID will just hide it from the public, but you will need to remember it exactly the first time you connect)
Advanced Wireless settings:
(This allows you to add pre-approved devices to the network- by doing this it prevents someone from having your password and getting in. Think of it as a secondary level of security)
Disable WMM
Set-up Access List (do this for every device that may connect)
Device Name: Add your Computer’s Name or Ipad Name
Airport or Ipad Mac Address: <six pairs of numbers/letters>
Enable Access Control (Click on the radio button)
After all the settings are complete Re-start Studio Manager and Check Port Protocols as listed above
_______________________________________________________________________________________________________________
Once your wireless network is set-up and functiong, the addition of the iPad will be the easiest part of the equation. Your iPad loaded with StageMix is completely independent from the StudioManager software and should never be run at the same time. I'm pretty sure that it will trigger a zombie apocalypse of epic porportions. Actually, they just conflict and it can't be done.
iPad Settings
Connect to your dedicated Yamaha network
Once connected, open the extended network settings
Choose Static
Set IP Address: 192.160.0.1
Subnet: 255.255.255.0
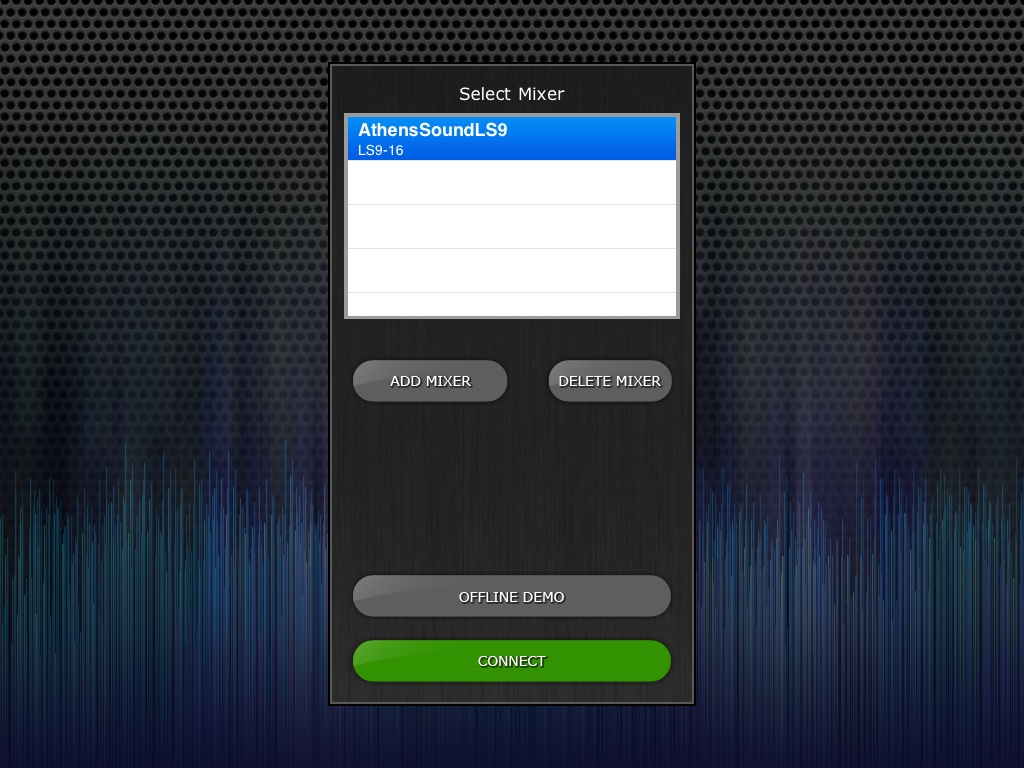
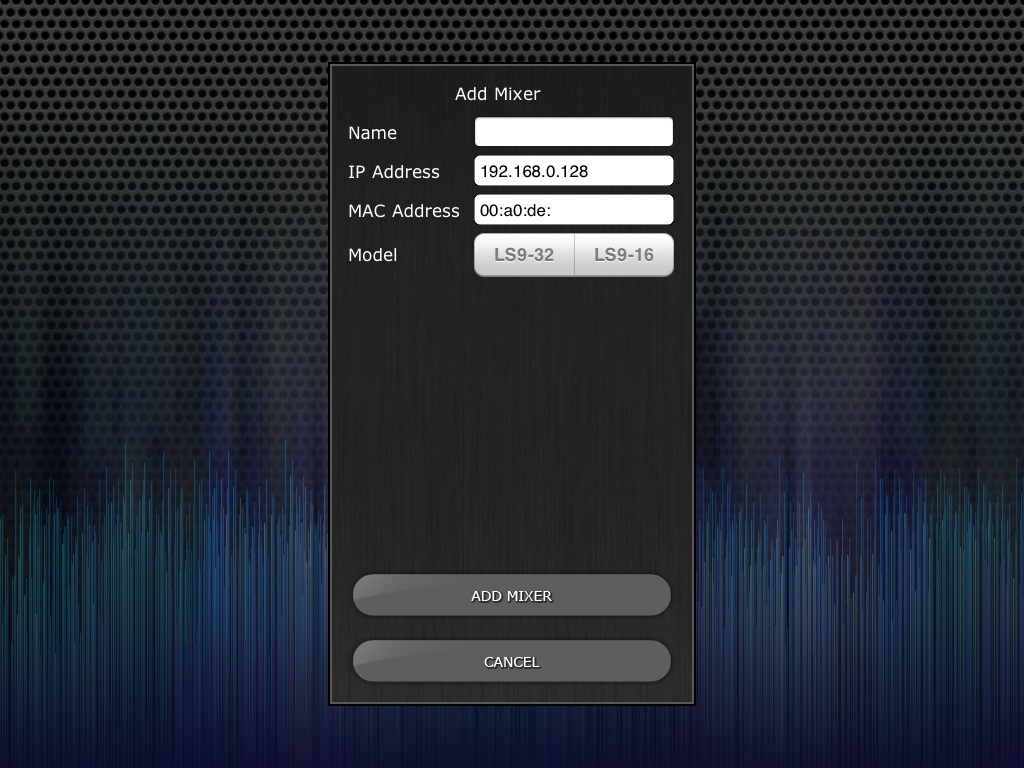
Open the StageMix App and Add a Mixer
- Give the Console you are adding a unique name
- Verify the IP address 192.168.1.128
- Enter the remain 3 MAC Address Pairs (specifc to the console, you can find this in the set-up on the mixer)
- Choose the Model Frame of the console
- Add Mixer
Choose Connect (The iPad will connect to the network without much problem, Once it says “Syncing” you are good to go.
The wireless router and the iPad will work as a team as you move from console to console. For instance, I take my wifi router and iPad to other other LS9 and M7CL consoles and all I have to do is just add the mixer to the list and update that particular mixers settings. No other settings ever have to be chnaged within the router or the iPad. While I have one Netgear mounted in my R&R doghouse case, I have since been on the quest to acquire more of these routers since they are obtainable for under $30.
I have to give major thank you's to the Athens, GA music community in helping me set these things up. First to Tom Ryan (Bass Player and Computer Programmer) for lending his expertise on the DNS codes. Secondly to Zach Wetzel (Audio Engineer at The University of Georgia) for his help in the documenting of this process. Without these two guys I would have never gotten all of this to work smoothly.
When all else fails you can reach Yamaha by phone at (866) 211-9366, however they are bound by the same rules that other manufacturers abide to: They can only help you with the items that are specific to their product, but overall they were very nice in giving me the right details to make it work.
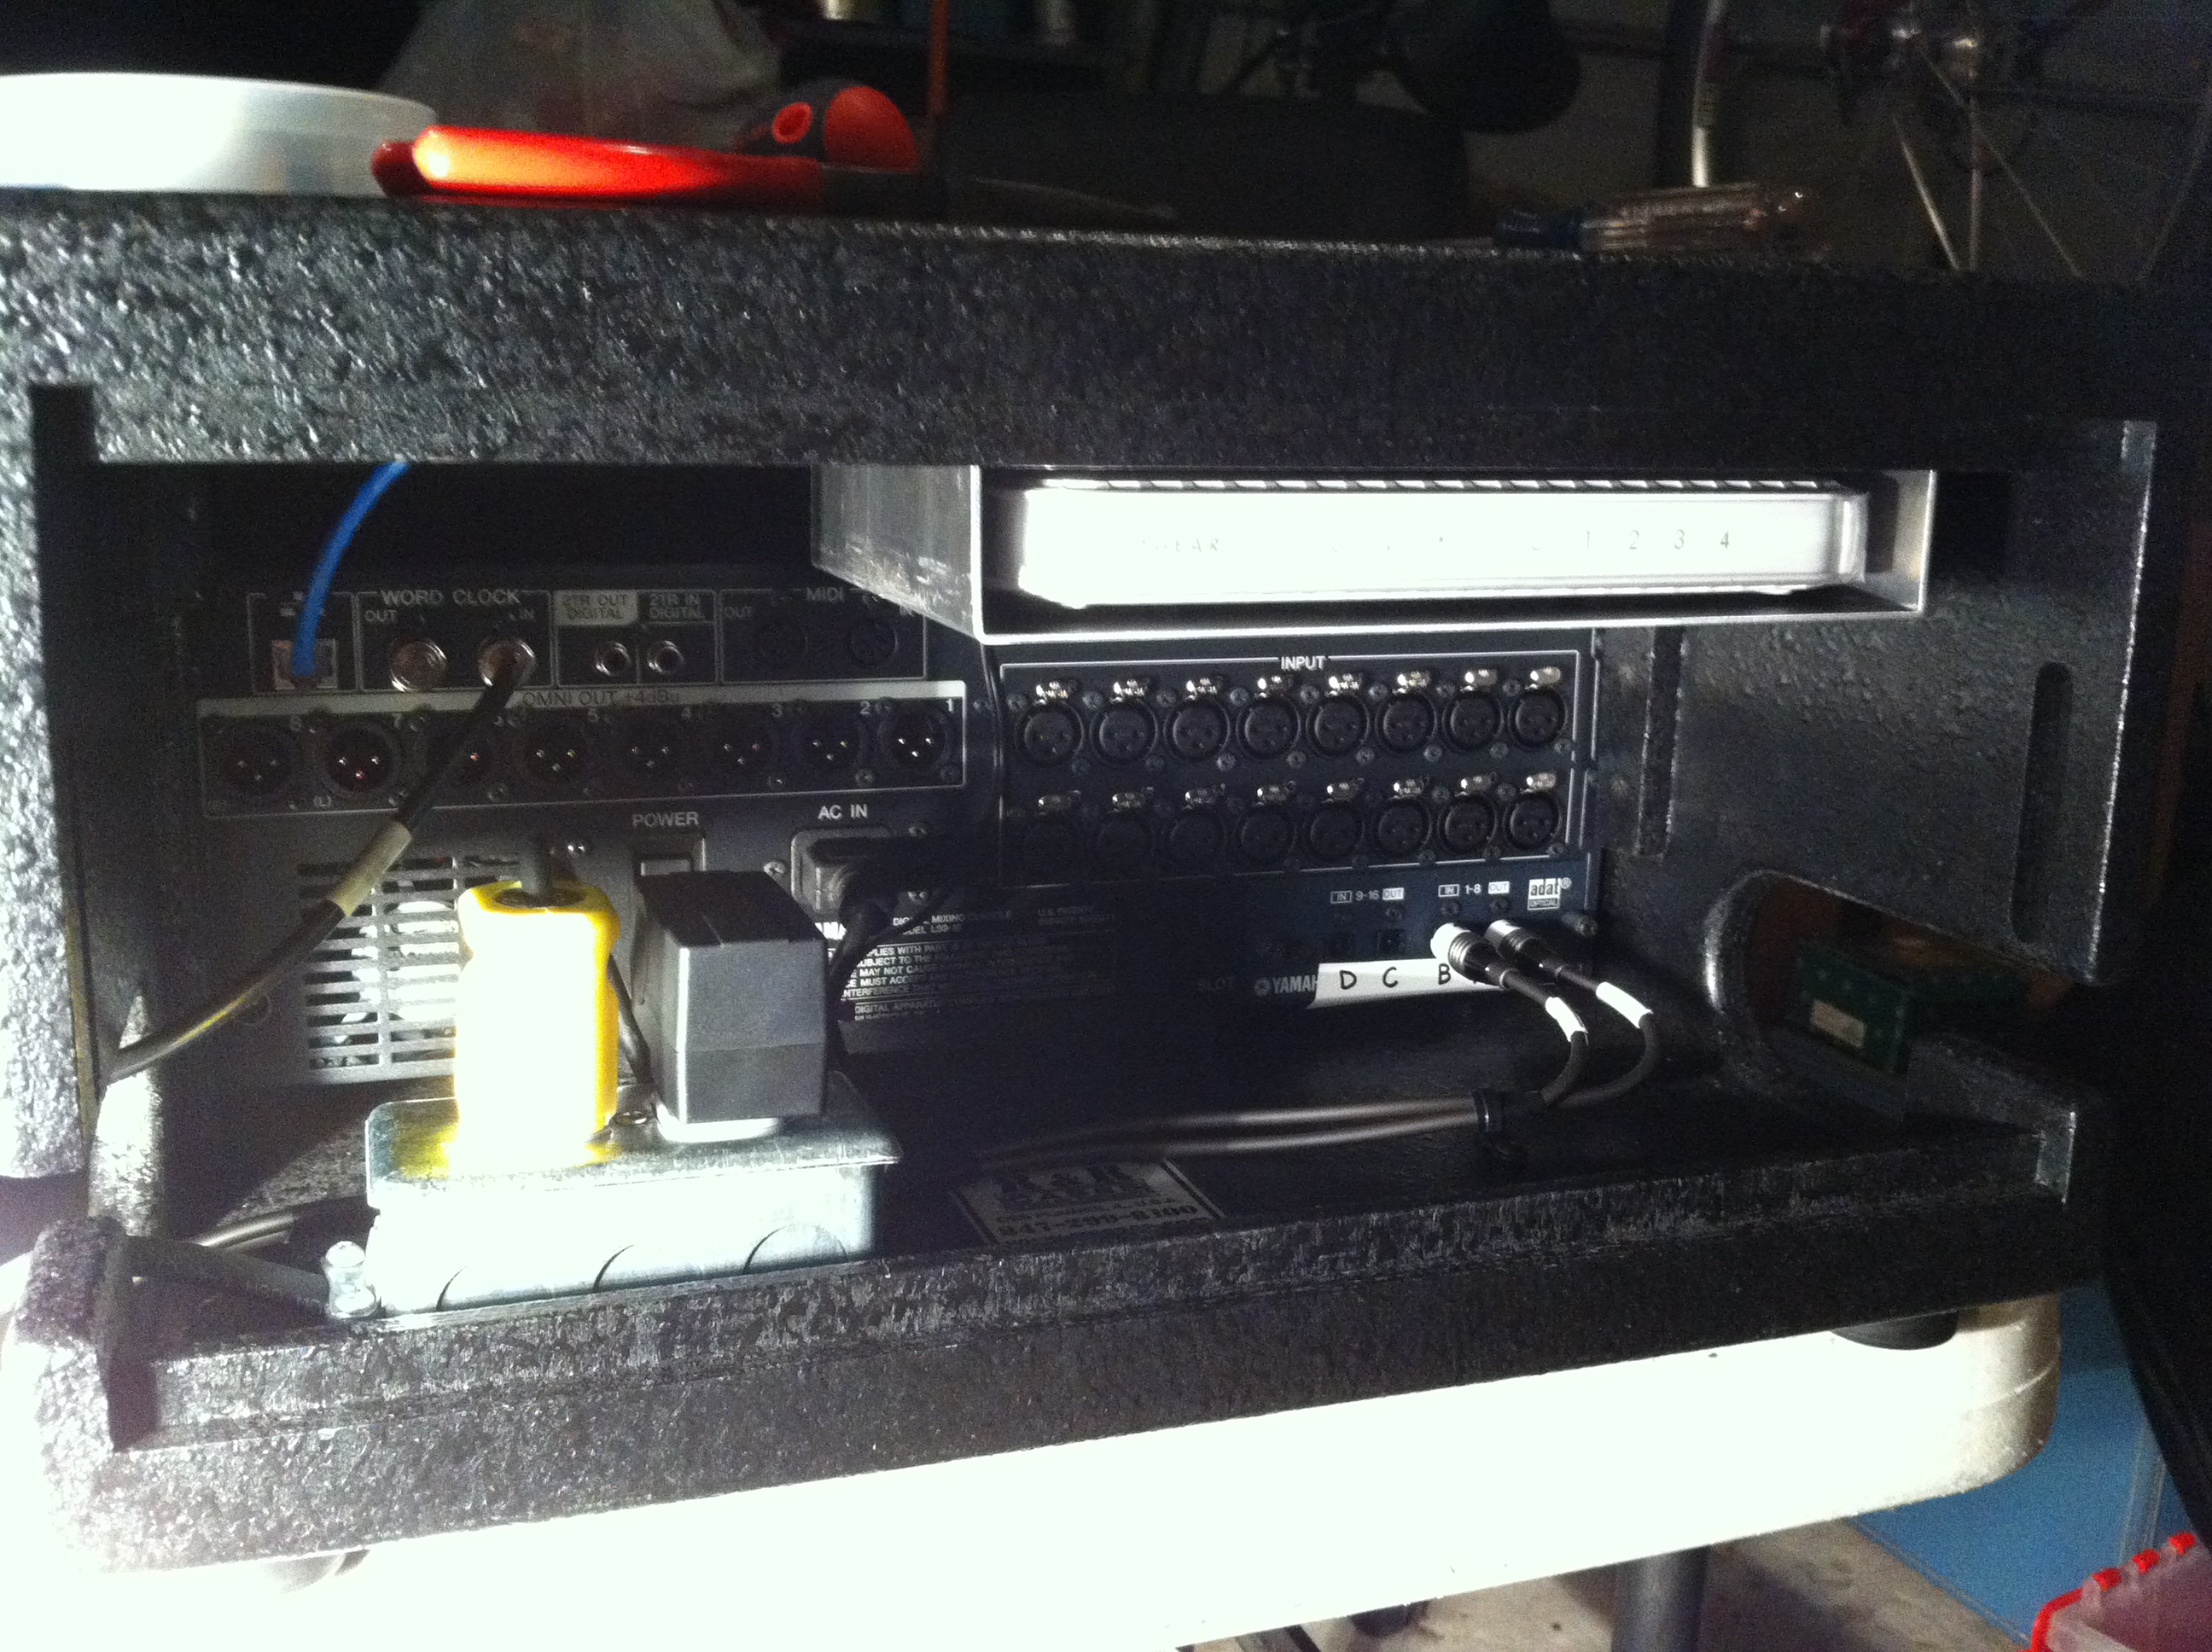
Here's my Netgear RangeMax N150 mounted in the back on my R&R case for the LS9. I had a local metal fabricator make me this aluminum shelf that screws to the top of the case. There is also a thick wooden trap door that goes on the back to conceal the cabling. The singal strength is still pretty superb and I can more than 250 feet away and still maintain connectivity to the console.